Welcome to Zynahz, your ultimate destination for culinary inspiration!
This Easter, we’re here to help you dazzle with creativity.
Discover 20 stunning Easter egg cookies designed to be the star of your celebrations.
Unleash your inner artist and make memories with every bite.
1. Pastel Ombre Easter Egg Cookies
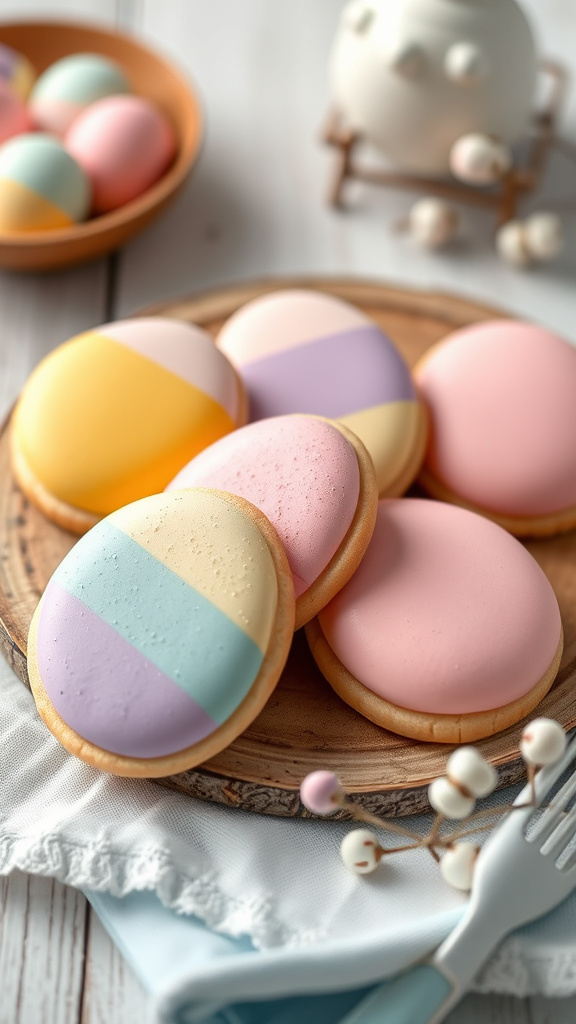
Elevate your Easter celebration with enchanting Pastel Ombre Easter Egg Cookies! These delicate treats feature a dreamy gradient of pastel hues that mirror the beauty of spring. Perfectly decorated to captivate guests, these cookies are as delightful to behold as they are to eat.
Each cookie boasts a smooth ombre effect that transitions seamlessly from one color to the next, making them a standout addition to your festive spread. Whether given as gifts or enjoyed at a gathering, these charming cookies are sure to steal the spotlight and bring smiles to all who see them.
Ingredients
- 2 ¾ cups all-purpose flour
- 1 teaspoon baking powder
- ½ teaspoon salt
- 1 cup unsalted butter, softened
- 1 ½ cups granulated sugar
- 1 large egg
- 2 teaspoons vanilla extract
- Gel food coloring in pastel shades (pink, blue, yellow, green)
- Royal icing (recipe follows)
Instructions
- Preheat your oven to 350°F (175°C). Line baking sheets with parchment paper.
- In a medium bowl, whisk together flour, baking powder, and salt. Set aside.
- In a large bowl, beat the butter and sugar until light and fluffy. Add the egg and vanilla extract, mixing well.
- Gradually add the dry ingredients to the wet ingredients, mixing until just combined.
- Roll out the dough on a floured surface to ¼ inch thickness. Use an egg-shaped cookie cutter to cut out shapes.
- Place the cutouts on the prepared baking sheets and bake for 10-12 minutes or until the edges are lightly golden. Cool completely.
- Divide the royal icing into separate bowls and tint each bowl with different pastel gel food coloring.
- Starting with the lightest color, pipe or spread a layer of icing onto each cookie. Gradually add deeper shades to create a smooth ombre effect. Allow icing to set completely.
Achieving the perfect balance between taste and appearance, Pastel Ombre Easter Egg Cookies are sure to be the highlight of your holiday treats. Their captivating colors and delightful flavor make them an irresistible addition to any Easter celebration. Get ready to wow your guests with these stunning cookies!
2. Floral-Inspired Easter Egg Delights
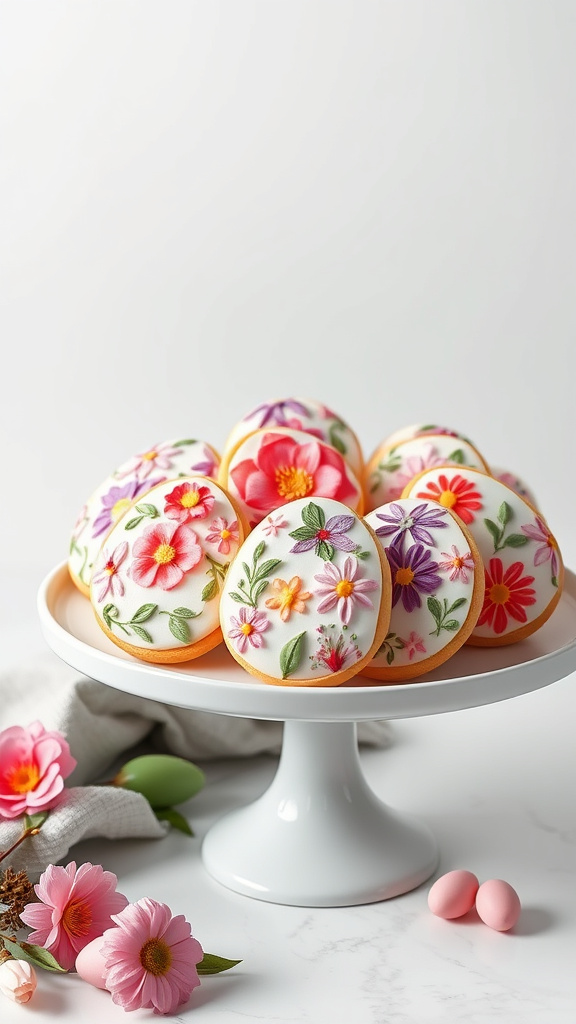
Brighten your Easter festivities with our Floral-Inspired Easter Egg Delights. These visually enchanting cookies combine the elegance of spring flowers with delectable sweetness, creating a centerpiece that’s as delightful to look at as it is to eat.
Perfect for brunch, dessert tables, or as a creative gift, they’re sure to steal the show with their intricate designs and mouthwatering flavors.
Ingredients
- 2 ½ cups all-purpose flour
- 1 ½ tsp baking powder
- ½ tsp salt
- 1 cup unsalted butter, softened
- 1 cup granulated sugar
- 1 large egg
- 1 tsp vanilla extract
- Royal icing in various colors
- Food coloring in floral shades
Instructions
- Preheat your oven to 350°F (175°C). Line baking sheets with parchment paper.
- In a medium bowl, whisk together the flour, baking powder, and salt.
- In a large bowl, beat butter and sugar until light and fluffy. Add egg and vanilla extract, beating well to combine.
- Gradually mix the dry ingredients into the wet mixture until combined. Divide the dough in half, wrap in plastic wrap, and chill for at least 1 hour.
- Roll out the dough to about ¼ inch thick on a floured surface. Use an egg-shaped cookie cutter to cut out shapes and transfer them to prepared baking sheets.
- Bake for 8-10 minutes, or until edges are lightly golden. Let cookies cool completely on wire racks.
- Once cooled, decorate the cookies with royal icing in various floral patterns. Use food coloring to dye the icing and add intricate details for a blossoming effect.
Your charming Floral-Inspired Easter Egg Delights are ready to steal the show at your holiday gathering! These delightful cookies, adorned with spring’s finest hues, promise to add a touch of whimsy and joy to any Easter celebration.
3. Blush Pink Easter Egg Sprinkles

Delight in the charm of Blush Pink Easter Egg Sprinkles, a beautiful addition to your Easter festivities. These cookies, adorned with elegant pink sprinkles, bring a touch of softness and elegance to your dessert table. Their delicate appearance will surely leave an impression on your guests.
Blush Pink Easter Egg Sprinkles cookies combine classic flavors with an adorable presentation. Perfect for springtime celebrations, these treats boast a playful energy while maintaining a sophisticated aura. They’re not just cookies; they’re an experience, awaiting to surprise and delight with every bite.
Transform your spring celebration with these gorgeous Blush Pink Easter Egg Sprinkles cookies. They’ll add a touch of elegance and joy to your festive spread!
Ingredients
- 2 cups all-purpose flour
- 1/2 cup unsalted butter, softened
- 1 cup granulated sugar
- 1 large egg
- 1 tsp vanilla extract
- 1/2 tsp baking powder
- 1/4 tsp salt
- Pink sprinkles
- Powdered sugar (for icing)
- Milk (for icing)
- Pink food coloring (optional, for icing)
Instructions
- Preheat your oven to 350°F (180°C) and line a baking sheet with parchment paper.
- In a medium bowl, whisk together flour, baking powder, and salt. Set aside.
- In a large bowl, cream together the butter and sugar until light and fluffy.
- Add the egg and vanilla extract to the butter mixture, mixing until well combined.
- Gradually add the dry ingredients to the wet mixture, stirring until a smooth dough forms.
- Roll out the dough on a lightly floured surface to about 1/4-inch thickness.
- Use an egg-shaped cookie cutter to cut out the cookies and place them on the prepared baking sheet.
- Bake for 8-10 minutes or until the edges begin to turn golden brown. Allow to cool completely on a wire rack.
- For the icing, mix powdered sugar with a small amount of milk to achieve your desired consistency. Add a drop of pink food coloring if desired.
- Once cookies are cool, spread icing over each one and top with pink sprinkles.
These Blush Pink Easter Egg Sprinkles cookies are not just a treat for the taste buds, but also a visual delight. The combination of buttery cookies and sweet sprinkles makes them truly irresistible. Perfect for any Easter gathering, they promise to bring smiles and joy to your festive celebration!
4. Speckled Gold Leaf Egg Treats
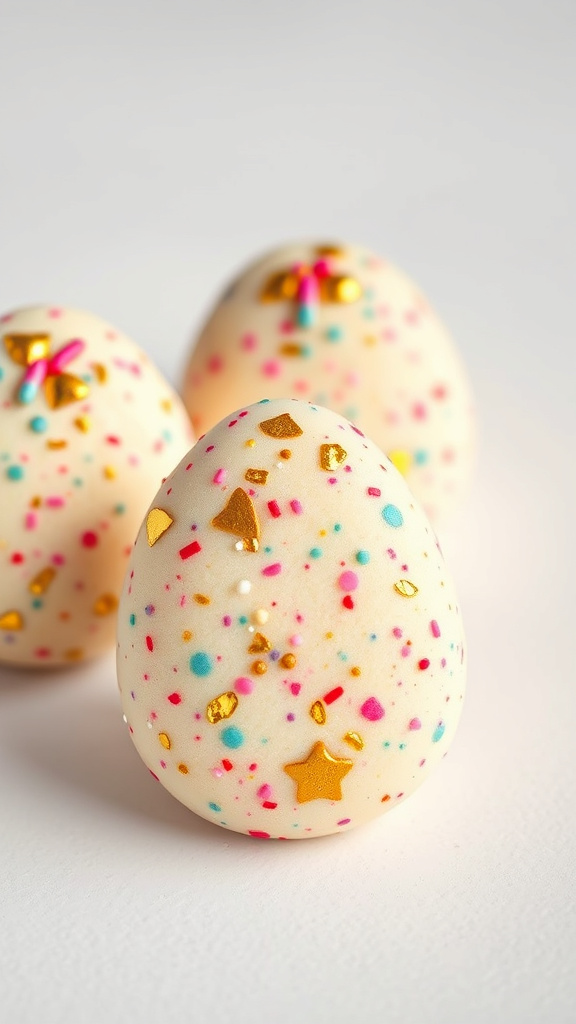
Imagine delicate egg-shaped cookies adorned in luxurious gold leaf and speckled with striking colors. These Speckled Gold Leaf Egg Treats are not just a feast for the eyes, but also a delightful burst of flavor, perfect for an Easter celebration. Each bite promises a journey of sweet decadence and elegant charm.
Creating these masterpieces is surprisingly simple, yet the results are nothing short of spectacular. These treats are guaranteed to steal the show at any Easter gathering, leaving your guests in awe and begging for your baking secrets.
Ingredients
- 2 cups all-purpose flour
- 1 cup unsalted butter, softened
- 1 cup granulated sugar
- 1 large egg
- 1 teaspoon vanilla extract
- 1/2 teaspoon baking powder
- Edible gold leaf
- Assorted food coloring
- Royal icing
- Sprinkles (optional)
Instructions
- Preheat the oven to 350°F (175°C) and line baking sheets with parchment paper.
- Cream together the butter and sugar until light and fluffy.
- Beat in the egg and vanilla extract until well combined.
- In a separate bowl, whisk together the flour and baking powder.
- Gradually add the dry ingredients to the wet mixture, mixing until a dough forms.
- Roll out the dough to about 1/4-inch thickness on a floured surface.
- Use egg-shaped cookie cutters to cut out the cookies and place them on the prepared baking sheets.
- Bake for 8-10 minutes or until the edges are lightly golden.
- Allow the cookies to cool completely on a wire rack.
- Decorate the cooled cookies with royal icing and speckle with food coloring.
- Carefully apply edible gold leaf to the speckled cookies and add sprinkles if desired.
- Let the decorated cookies dry completely before serving.
These Speckled Gold Leaf Egg Treats will transform your Easter celebration into a sophisticated soiree. Not only are they stunning to look at, but each cookie is a testament to your creativity. Make a batch and watch as they become the centerpiece of admiration and a delicious treat.
5. Watercolor Iced Egg Cookies
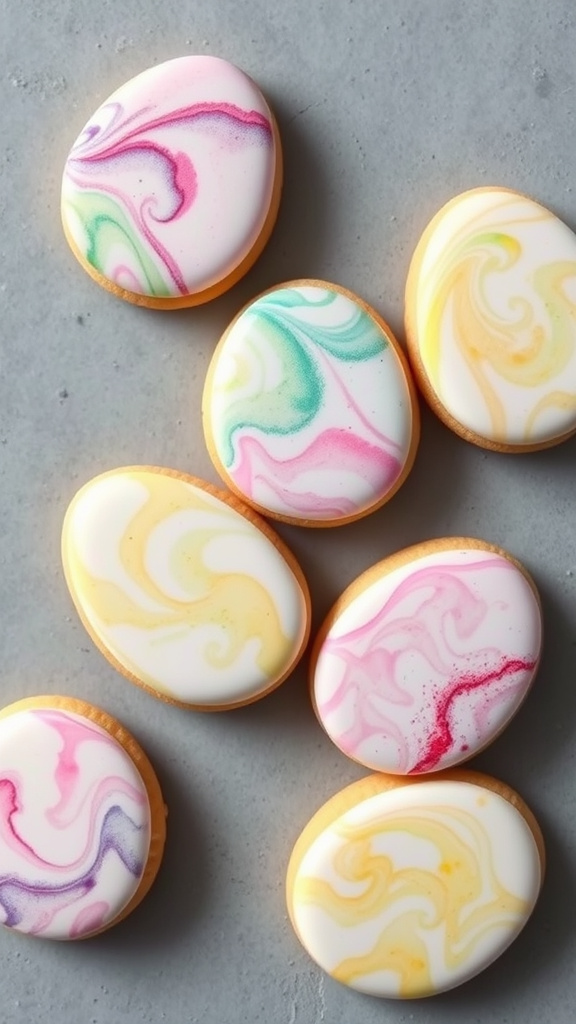
Imagine the delight on your guests’ faces when they see these stunning watercolor iced egg cookies at your Easter celebration. Each cookie is an edible masterpiece, combining pastel hues and whimsical designs that capture the essence of spring.
With a blend of creativity and confectionery skills, these treats not only taste divine but are sure to steal the spotlight.
Perfect for a festive gathering, these watercolor egg cookies add a pop of color and charm to your dessert spread. The marbled effect of the icing mimics delicate watercolor paintings, making each cookie unique and a joy to behold. Let your artistic side shine and create a batch of these beautiful cookies that are as enjoyable to make as they are to eat.
Ingredients
- 1 cup unsalted butter, softened
- 1 cup granulated sugar
- 1 large egg
- 2 teaspoons vanilla extract
- 2 ¾ cups all-purpose flour
- 1 teaspoon baking powder
- ½ teaspoon salt
- 2 cups powdered sugar
- 3-4 tablespoons milk
- Food coloring
Instructions
- In a large bowl, cream the butter and granulated sugar until light and fluffy. Beat in the egg and vanilla extract.
- In another bowl, whisk together the flour, baking powder, and salt. Gradually add the dry ingredients to the wet mixture, mixing well.
- Divide the dough into two portions, wrap in plastic wrap, and refrigerate for at least 1 hour.
- Preheat your oven to 350°F (175°C) and line baking sheets with parchment paper.
- Roll out the dough on a floured surface to about ¼-inch thickness. Cut out egg shapes using a cookie cutter and place on the prepared baking sheets.
- Bake for 8-10 minutes until the edges are slightly golden. Let cookies cool completely on wire racks.
- For the icing, whisk together the powdered sugar and milk until smooth. Divide the icing into small bowls and tint each with different food coloring.
- Using a small brush, lightly dip into the colored icing and apply on top of the cookies, creating a watercolor effect. Blend colors as desired for a marbled look.
- Allow the icing to set completely before serving.
These watercolor iced egg cookies are a delightful addition to any Easter celebration. The creative process of decorating each cookie adds an extra touch of joy, making it a perfect activity for families to share. With their enchanting appearance and delectable taste, these cookies are sure to be the highlight of your festive table.
6. Edible Glitter Easter Eggs
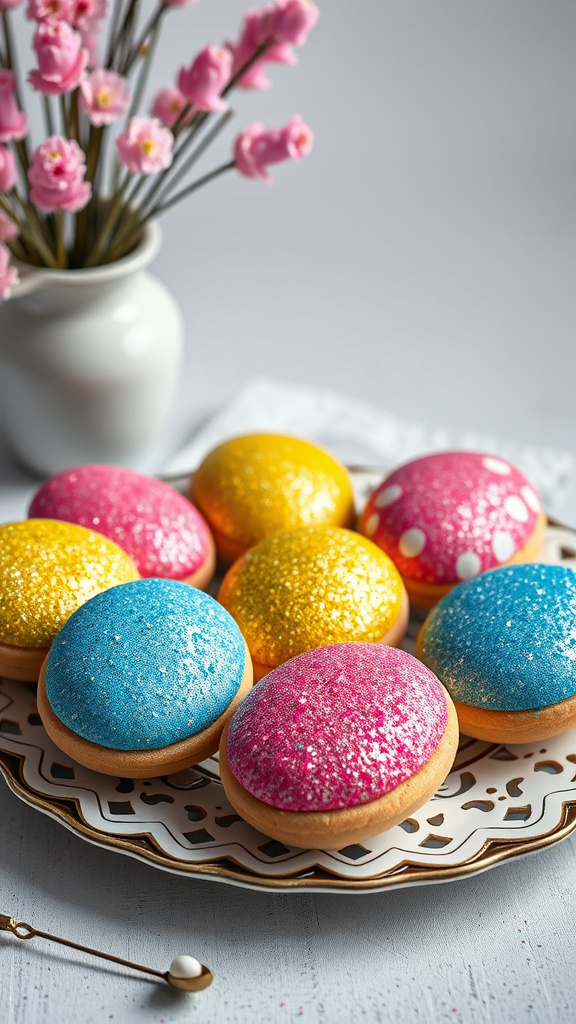
Sugar, sparkle, and a dash of whimsy come alive in our Edible Glitter Easter Eggs. These magical treats effortlessly blend vibrant hues with a shimmery finish, perfect for elevating your Easter festivities to dazzling new heights. Each bite is a delightful dance of flavors and colors, sure to enchant both kids and adults alike.
Best of all, these whimsical cookies are as easy to make as they are stunning to behold. With a simple recipe and a few sparkly secrets, you’ll have a batch of twinkling Easter egg cookies ready to steal the spotlight at your holiday gathering. Get ready to spread some glittery sweetness!
Ingredients
- 2 1/2 cups all-purpose flour
- 1/2 teaspoon baking powder
- 1/4 teaspoon salt
- 3/4 cup unsalted butter, softened
- 1 cup sugar
- 1 large egg
- 1 teaspoon vanilla extract
- Assorted food coloring
- Edible glitter
- Royal icing for decorating
Instructions
- Preheat your oven to 350°F (175°C). Line baking sheets with parchment paper.
- In a medium bowl, whisk together flour, baking powder, and salt. Set aside.
- In a large bowl, beat butter and sugar until light and fluffy. Add the egg and vanilla extract, mixing well.
- Gradually add the dry ingredients to the wet mixture, stirring until a dough forms.
- Divide the dough into separate bowls and add food coloring to each, mixing until evenly colored. Wrap in plastic and refrigerate for 30 minutes.
- Roll out the dough on a floured surface to 1/4-inch thickness. Cut out egg shapes using cookie cutters and place on prepared baking sheets.
- Bake for 8-10 minutes or until edges are lightly golden. Cool on wire racks.
- Decorate the cookies with royal icing and sprinkle with edible glitter while still wet. Allow the icing to set before serving.
Adding a sparkle to your Easter spread, these Edible Glitter Easter Eggs are not only a feast for the eyes but also a joy to make. Perfect for sharing or gifting, these cookies promise an unforgettable, sparkly twist to your holiday treats.
Happy Easter, cookie decorators and glitter lovers alike!
7. Marbled Chocolate Easter Eggs
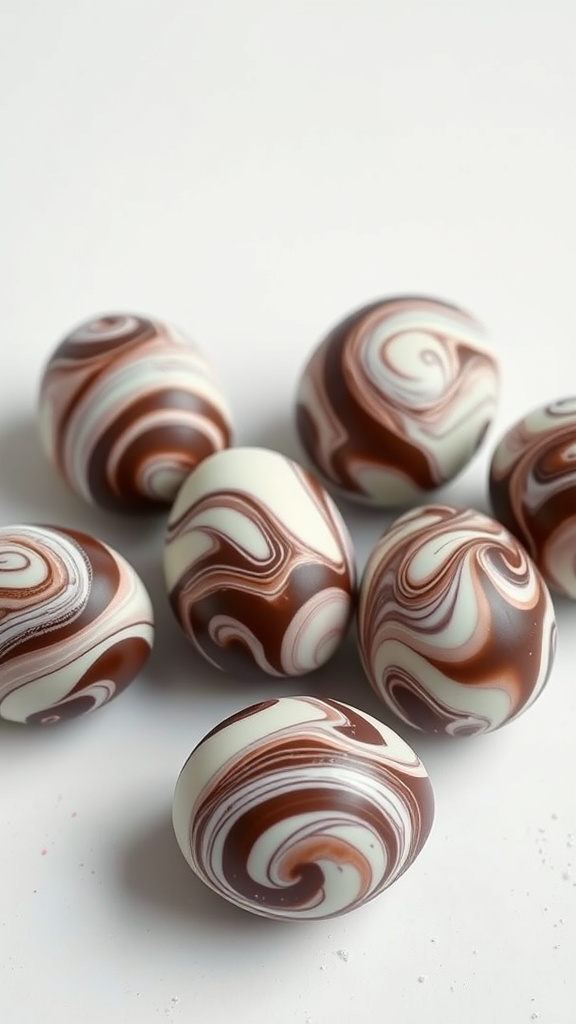
7. Marbled Chocolate Easter Eggs are a surefire way to add a touch of elegance and charm to your Easter celebrations. These beautifully swirled treats not only taste divine but also create a mesmerizing visual appeal that will captivate your guests as soon as they take a glance.
The secret to their allure lies in the careful marbling of white and dark chocolate, resulting in an enchanting pattern. Perfect for both children and adults, these marbled eggs will quickly become a seasonal favorite in your household. They’re almost too pretty to eat—but who can resist?
Ingredients
- 200g white chocolate
- 200g dark chocolate
- Colorful edible glitter (optional)
- Egg-shaped silicone molds
Instructions
- Melt the white chocolate and dark chocolate in separate bowls over a double boiler or in the microwave.
- Once melted, let them cool for a couple of minutes but do not let them harden.
- Spoon a small amount of white chocolate into each mold, followed by a little dark chocolate.
- Use a toothpick to swirl the chocolates together to create a marble effect.
- Optionally, sprinkle with edible glitter for a touch of sparkle.
- Place the molds in the refrigerator to set for at least an hour.
- Carefully remove the marbled chocolate eggs from the molds and admire your handiwork!
These Marbled Chocolate Easter Eggs are not just visually stunning but also delightfully delicious. They’re an elegant and tasty addition to your Easter festivities, adding a magical touch that will surely steal the show.
8. Botanical Print Egg Cookies
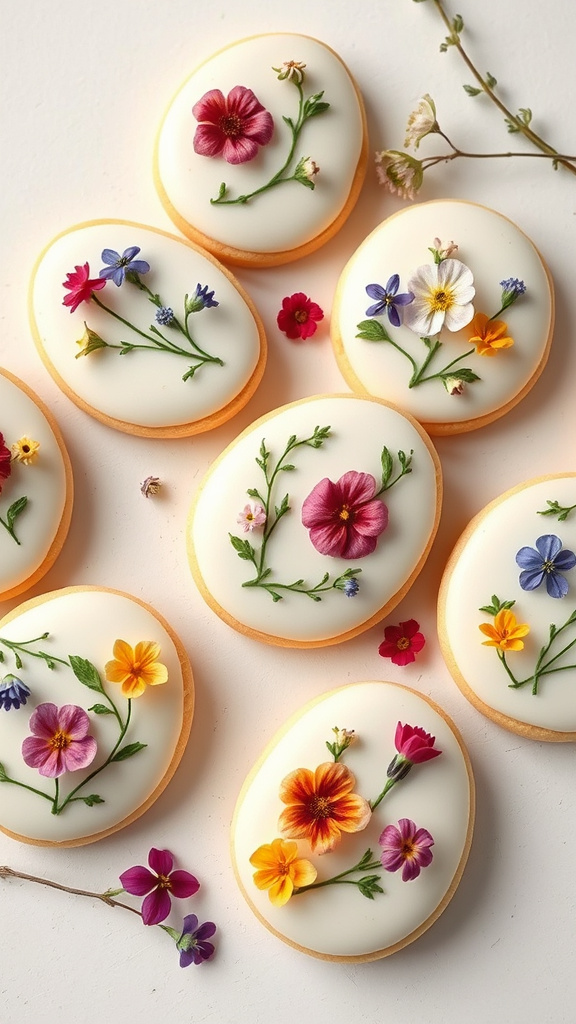
Botanical Print Egg Cookies are not just a treat for your taste buds, but a feast for the eyes as well! Made with delicate, edible flowers and herbs, these stunning cookies embody the spirit of spring and Easter. Imagine your guests’ delight as they indulge in these intricately decorated cookies.
Celebrate the beauty of nature with every bite, impressing family and friends with your artistic touch and culinary skills. Perfect for Easter gatherings, these cookies capture the essence of the season, making your festive table both gorgeous and delectable.
Ingredients
- 2 cups all-purpose flour
- 1/2 teaspoon baking powder
- 1/4 teaspoon salt
- 1/2 cup unsalted butter, softened
- 1 cup granulated sugar
- 1 large egg
- 1 teaspoon vanilla extract
- Edible flowers and herbs for decoration
- Royal icing (1 cup confectioners’ sugar, 1-2 tablespoons meringue powder, 2-3 tablespoons water)
Instructions
- Preheat your oven to 350°F (175°C). Line baking sheets with parchment paper.
- In a bowl, whisk together flour, baking powder, and salt. Set aside.
- In a large bowl, beat the butter and sugar until light and fluffy. Add the egg and vanilla extract, beating until combined.
- Gradually add the dry ingredients to the wet mixture, mixing just until incorporated.
- Roll out the dough to about 1/4-inch thickness on a lightly floured surface. Use an egg-shaped cookie cutter to cut out cookies.
- Place cookies on prepared baking sheets and bake for 8-10 minutes, or until edges are lightly golden. Let cool completely on wire racks.
- Prepare the royal icing by mixing confectioners’ sugar, meringue powder, and water until smooth. Adjust consistency as needed.
- Using a piping bag, decorate cooled cookies with royal icing. Before the icing dries, press edible flowers and herbs gently onto the cookies.
- Let the decorated cookies sit until the icing is completely dry, about an hour.
Elevate your Easter celebrations with these gorgeous Botanical Print Egg Cookies. Not only do they taste heavenly, but they also add an artisan touch to your festive dessert table. Delight guests with both the beauty and flavor of these edible masterpieces.
9. Tie-Dye Icing Easter Eggs
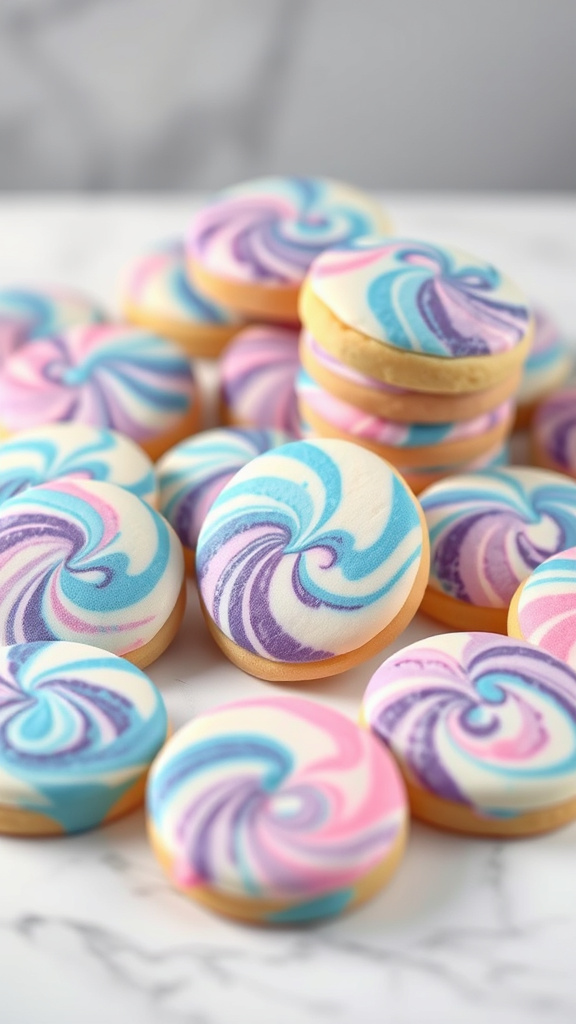
Get ready to dazzle your Easter brunch with these vibrant Tie-Dye Icing Easter Eggs! Perfectly combining pastel colors and creative artistry, these cookies are as much fun to make as they are to eat. Dive into a world of swirling colors that will make your Easter celebration absolutely delightful!
These eye-catching Easter egg cookies are ideal for bringing a splash of joy to any festive gathering. The tie-dye effect is surprisingly easy to achieve and will have both kids and adults marveling at your cookie decorating skills. Let’s create some edible masterpieces together!
Ingredients
- 1 batch of your favorite sugar cookie dough
- Assorted food coloring (pastel preferred)
- 3 cups powdered sugar
- 1/4 cup milk
- 2 tablespoons light corn syrup
- 1 teaspoon vanilla extract
Instructions
- Preheat oven according to your sugar cookie dough recipe, and line a baking sheet with parchment paper.
- Roll out the cookie dough and use an egg-shaped cookie cutter to cut out shapes.
- Place the cookies on the prepared baking sheet and bake according to the recipe instructions. Let them cool completely.
- In a medium bowl, whisk together powdered sugar, milk, light corn syrup, and vanilla extract until smooth.
- Divide the icing into separate bowls and add food coloring to each, creating various pastel colors.
- Spoon different colors of icing randomly over each cookie. Use a toothpick to swirl and blend the colors, creating a tie-dye effect.
- Allow the icing to set completely before serving or packaging the cookies.
Unleash your inner artist with these delicious and beautiful Tie-Dye Icing Easter Eggs! This captivating cookie decorating project is sure to steal the show and thrill family and friends. Hop into this colorful Easter adventure and let every bite be a mini masterpiece!
10. Rustic Burlap Texture Eggs
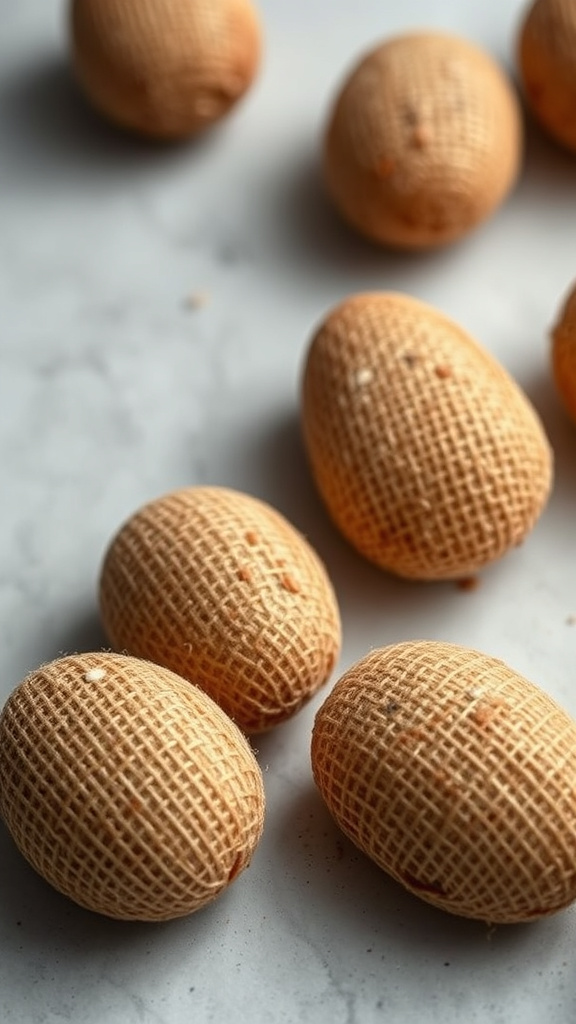
10. Rustic Burlap Texture Eggs are perfect for adding a touch of countryside charm to your Easter celebrations. These uniquely styled egg cookies bring the essence of rustic aesthetics, combining a cozy homespun feel with festive cheer. They’re sure to captivate both your taste buds and your sense of style.
With their intricate burlap-like texture, these eggs showcase an endearing, handcrafted appearance. The delicate design is not only visually mesmerizing but also highlights the loving craftsmanship behind each cookie. Perfect for your Easter spread, these cookies will make a delightful, eye-catching centerpiece that friends and family will adore.
Ingredients
- 2 1/2 cups all-purpose flour
- 1 teaspoon baking powder
- 1/2 teaspoon salt
- 1 cup unsalted butter, softened
- 1 cup granulated sugar
- 1 large egg
- 1 teaspoon vanilla extract
- Burlap-textured rolling pin
- Royal icing in natural shades
Instructions
- Preheat the oven to 350°F (175°C) and line a baking sheet with parchment paper.
- In a medium bowl, whisk together the flour, baking powder, and salt, then set aside.
- In a large mixing bowl, beat the butter and sugar together until light and fluffy. Add the egg and vanilla extract, mixing well to combine.
- Gradually add the dry ingredients to the wet mixture, mixing until a smooth dough forms.
- Roll out the dough to a 1/4-inch thickness on a lightly floured surface.
- Using an egg-shaped cookie cutter, cut out the dough and place the shapes on the prepared baking sheet.
- Gently roll the burlap-textured rolling pin over the cookie shapes to create the rustic texture.
- Bake for 10-12 minutes, or until the edges are lightly golden. Let cool completely on a wire rack.
- Once cooled, decorate with royal icing in natural shades for a beautifully rustic finish.
These Rustic Burlap Texture Eggs will surely steal the show on your Easter cookie platter. Their charmingly textured surface and delightful taste make them a perfect addition to any festive gathering. Happy baking and enjoy the admiration from your guests!
11. Geometric Patterned Easter Cookies
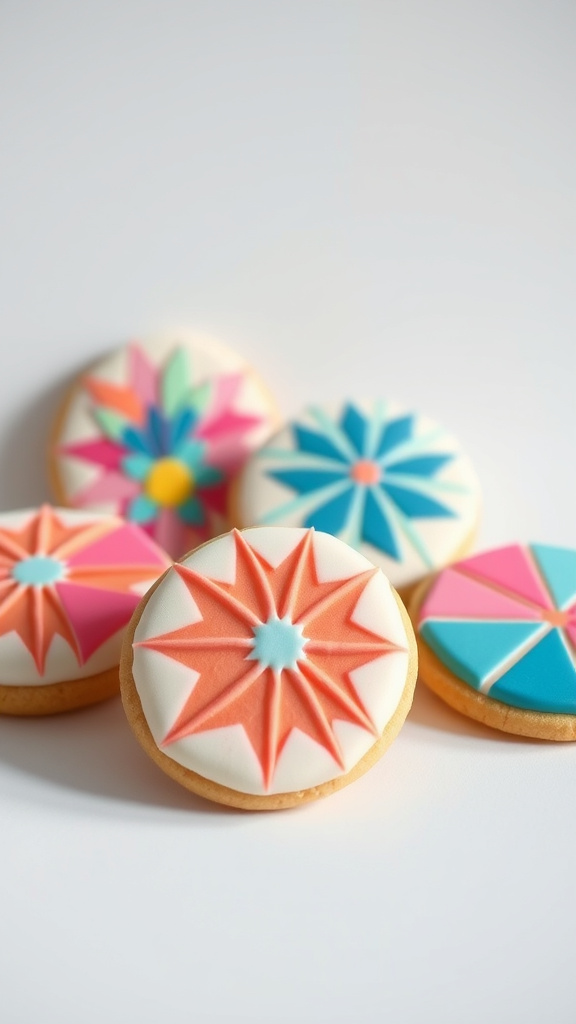
Celebrate Easter with these stunning geometric patterned cookies that blend artistry and deliciousness. These intricately decorated treats are sure to captivate your guests, making your dessert table the highlight of any gathering. Embrace the charm of spring with a delightful twist on traditional Easter cookies.
Unleash your creativity with these uniquely designed cookies featuring vibrant geometric patterns. With every bite, your friends and family will savor not just the mouthwatering flavors but also the visual feast. Get ready to impress with your baking masterpiece this Easter season!
Ingredients
- 2 1/2 cups all-purpose flour
- 1/2 tsp baking powder
- 1/4 tsp salt
- 1 cup unsalted butter, softened
- 1 cup granulated sugar
- 1 large egg
- 1 tsp vanilla extract
- Assorted food coloring gels
- Royal icing (8 oz confectioners’ sugar, 2 tbsp meringue powder, 3 tbsp water)
Instructions
- Preheat oven to 350°F (175°C). Line baking sheets with parchment paper.
- In a bowl, whisk together flour, baking powder, and salt.
- In a separate bowl, beat butter and sugar until light and fluffy. Add egg and vanilla, beating until combined.
- Gradually add the dry ingredients to the wet mixture, mixing until just combined.
- Roll dough to 1/4-inch thickness and cut out Easter egg shapes with a cookie cutter.
- Place on baking sheets and bake for 10-12 minutes, until edges are lightly golden. Cool on a wire rack.
- Prepare royal icing by mixing confectioners’ sugar, meringue powder, and water until smooth.
- Divide icing into bowls and tint with food coloring gels.
- Decorate cooled cookies with geometric patterns using icing, allowing each color to set before adding new designs.
Your geometric patterned Easter cookies are ready to dazzle! With their vibrant designs and delectable taste, these cookies are perfect for sharing and celebrating the joy of Easter. Enjoy creating these edible works of art!
12. Neon Swirl Egg Sweets
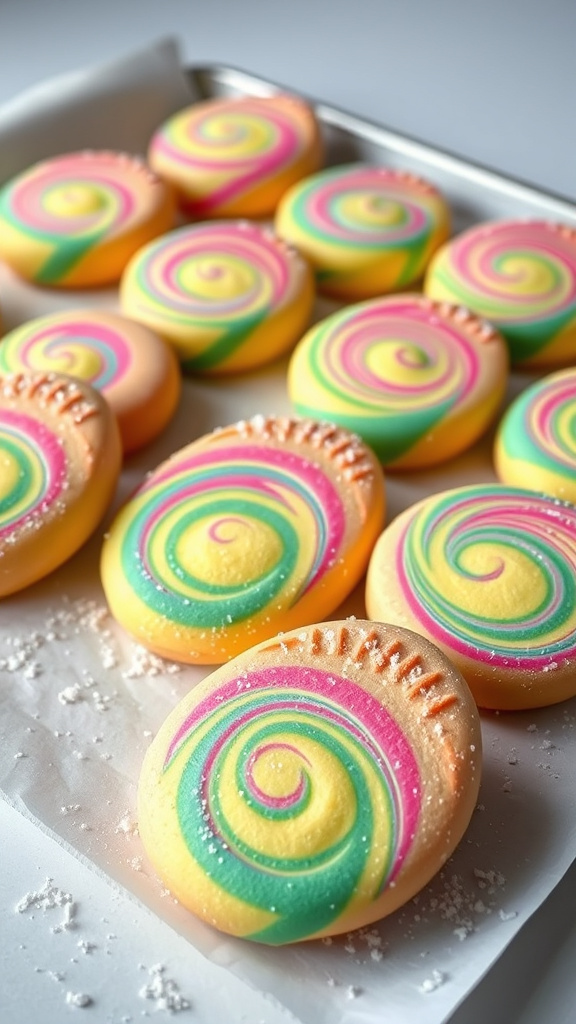
Get ready to light up your Easter celebration with 12. Neon Swirl Egg Sweets! These vivid, fun-filled cookies are perfect for adding a splash of color to your holiday spread. Each cookie boasts mesmerizing neon swirls that are guaranteed to steal the show and enchant your guests.
Whether you’re hosting a large family gathering or a cozy brunch, these eye-catching cookies are a must-have. The buttery, soft texture combined with the vibrant swirls makes for a delightful treat that’s both scrumptious and visually stunning. Embrace the festive spirit with these dazzling Easter egg cookies!
Ingredients
- 2 1/2 cups all-purpose flour
- 1/2 teaspoon baking powder
- 1/4 teaspoon salt
- 1 cup unsalted butter, room temperature
- 1 cup granulated sugar
- 1 large egg
- 1 teaspoon vanilla extract
- Food coloring (neon green, neon pink, neon blue, neon yellow)
- 1/4 cup powdered sugar (for rolling)
Instructions
- Preheat your oven to 350°F (175°C) and line baking sheets with parchment paper.
- In a medium bowl, whisk together the flour, baking powder, and salt; set aside.
- In a large bowl, beat the butter and sugar until light and fluffy, about 3-4 minutes.
- Add the egg and vanilla extract, beating until combined.
- Gradually add the dry ingredients to the wet mixture, mixing until just combined.
- Divide the dough into four equal portions. Dye each portion a different neon color using the food coloring.
- Take small pieces of each colored dough and roll them into grape-sized balls. Gently roll the different colored balls together to form a swirl effect, then shape into an egg shape.
- Dust the shaped cookies with powdered sugar and place them on the prepared baking sheets.
- Bake for 10-12 minutes, or until the edges are slightly golden. Allow the cookies to cool on the baking sheets for 5 minutes before transferring to wire racks to cool completely.
The 12. Neon Swirl Egg Sweets are sure to be a fan favorite with their vibrant hues and delightful taste. Perfect for parties or as a festive gift, these cookies are both fun to make and delicious to eat. Enjoy baking these colorful treats and watch them bring a smile to everyone’s face!
13. Gothic Chic Egg Cookies
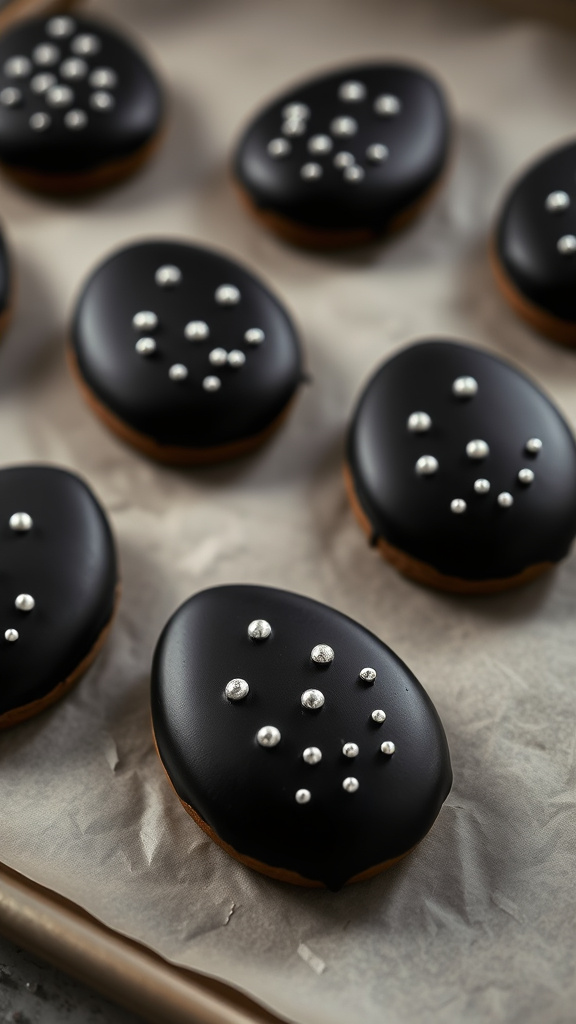
These Gothic Chic Egg Cookies are here to add a darkly elegant twist to your Easter festivities. Imagine cookies that balance a sophisticated black hue with intricate designs, showing off an alluring and spooky charm. Perfect for those who want to mix it up and steal the show with something unconventional yet chic.
Decadent and detailed, these cookies are more than just a treat; they’re art. Crafted with care and adorned with black icing and silver pearls, they transform classic Easter themes into glamorously gothic creations. Ready to make a bold statement at your Easter gathering? Here’s how to create them.
Ingredients
- 1 cup unsalted butter, softened
- 1 cup granulated sugar
- 1 large egg
- 1 tsp vanilla extract
- 2 1/2 cups all-purpose flour
- 1/2 tsp baking powder
- 1/4 tsp salt
- Black food coloring
- Black royal icing
- Silver edible beads
Instructions
- Preheat your oven to 350°F (175°C). Line a baking sheet with parchment paper.
- In a large bowl, cream together the unsalted butter and granulated sugar until light and fluffy.
- Add the large egg and vanilla extract to the mixture, and continue to beat until well combined.
- In a separate bowl, whisk together the all-purpose flour, baking powder, and salt.
- Gradually add the dry ingredients to the wet mixture, mixing until a dough forms.
- Knead in black food coloring until the dough has an even color throughout.
- Roll out the dough on a floured surface to about 1/4 inch thickness and cut into egg shapes using a cookie cutter.
- Place the cookies on the prepared baking sheet and bake for 10-12 minutes, or until the edges are lightly golden.
- Let the cookies cool completely on a wire rack before decorating.
- Once cooled, use black royal icing to decorate the cookies and add silver edible beads for a chic gothic finish.
Bake these Gothic Chic Egg Cookies to wow your guests with a dark, yet delightful treat that stands out in the Easter crowd. Perfect for those wanting to try something uniquely stylish, these cookies are both a visual and flavorful sensation!
14. Rainbow Unicorn Egg Cookies
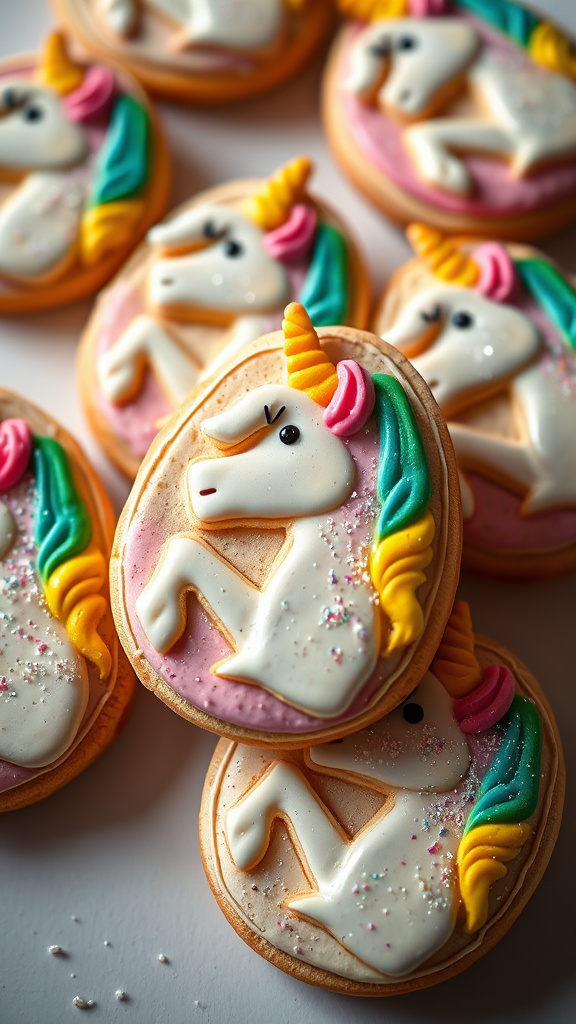
Prepare to be enchanted by these whimsical Rainbow Unicorn Egg Cookies! Perfect for Easter, these magical treats showcase vibrant colors that are sure to captivate children and adults alike. They’re not just pretty to look at; they promise a burst of delightful flavors with every bite.🌈🦄
These cookies are a blend of fun and fantasy, featuring intricately designed unicorn motifs that make them the star of any Easter celebration. Get ready to impress your guests with a cookie creation that’s as beautiful as it is delicious. Let’s bring these delightful cookies to life!
Ingredients
- 1 cup unsalted butter, softened
- 1 cup granulated sugar
- 1 large egg
- 1 tsp vanilla extract
- 2 ½ cups all-purpose flour
- 1 tsp baking powder
- ¼ tsp salt
- Assorted gel food coloring
- Royal icing
- Edible glitter
Instructions
- Preheat oven to 350°F (175°C). Line baking sheets with parchment paper.
- In a large bowl, cream butter and sugar until light and fluffy.
- Beat in the egg and vanilla extract.
- In another bowl, whisk together flour, baking powder, and salt. Gradually add to the butter mixture, mixing until combined.
- Divide dough into portions and dye each with a different gel food coloring.
- Roll out dough on a floured surface and cut into egg shapes using a cookie cutter.
- Place on baking sheets and bake for 10-12 minutes. Cool on wire racks.
- Decorate cookies with royal icing, creating beautiful unicorn designs. Add edible glitter for a magical touch.
These Rainbow Unicorn Egg Cookies will add a splash of color and a sprinkle of magic to your Easter festivities. Enjoy making and sharing these delightful confections with loved ones. Happy Easter!✨
15. Spring Blooms Egg Biscuits
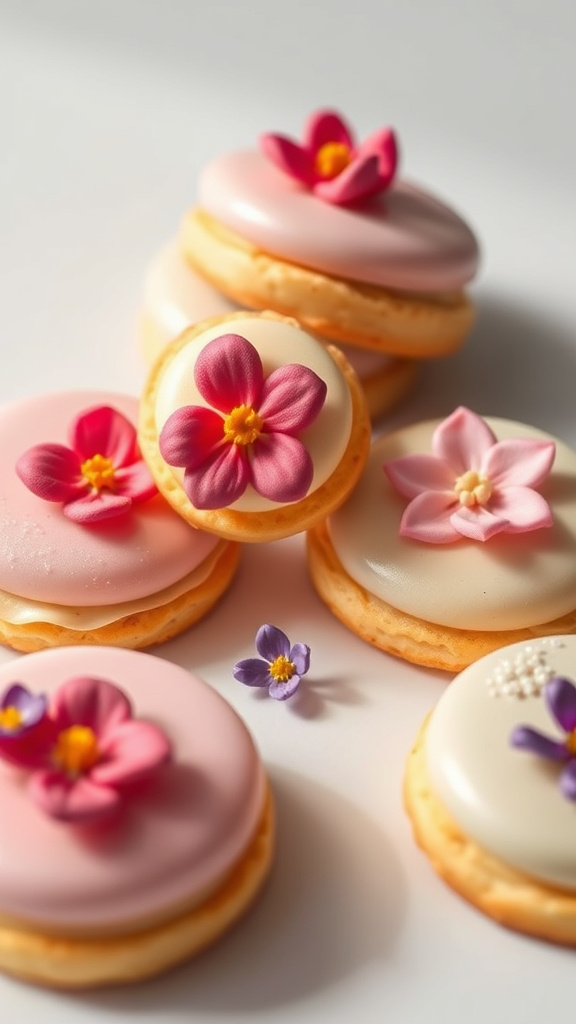
The Spring Blooms Egg Biscuits are designed to bring a pop of color and a whiff of floral delight to your Easter festivities. Adorned with vibrant, edible flowers and pastel hues, these cookies are not just a treat for the taste buds but also a feast for the eyes.
Perfect for sharing with family and friends, these biscuits evoke the fresh essence of spring with every bite. Let your creative spirit bloom as you decorate each egg-shaped biscuit, ensuring they rightfully steal the show at any Easter gathering.
Ingredients
- 2 cups all-purpose flour
- 1/2 teaspoon baking powder
- 1/4 teaspoon salt
- 1/2 cup unsalted butter, softened
- 1 cup granulated sugar
- 1 large egg
- 1 teaspoon vanilla extract
- Food coloring (optional)
- Edible flowers for decoration
- Royal icing or any preferred decorative icing
Instructions
- Preheat your oven to 350°F (175°C) and line a baking sheet with parchment paper.
- In a mixing bowl, whisk together flour, baking powder, and salt.
- In a separate bowl, cream the butter and sugar until light and fluffy.
- Beat in the egg and vanilla extract until well combined.
- Gradually add the dry ingredients to the wet mixture, mixing just until a dough forms.
- If desired, divide the dough and mix in food coloring for a festive touch.
- Shape the dough into an egg shape or use an egg-shaped cookie cutter and place on the baking sheet.
- Bake for 10-12 minutes, until the edges are lightly golden.
- Allow the biscuits to cool completely before decorating with royal icing and edible flowers.
Celebrate the renewal of spring with these beautifully decorated Spring Blooms Egg Biscuits. Customizable with a touch of color and stunning florals, they promise to be a standout feature at your Easter table. Happy baking and decorating!
16. Galaxy-Inspired Easter Eggs
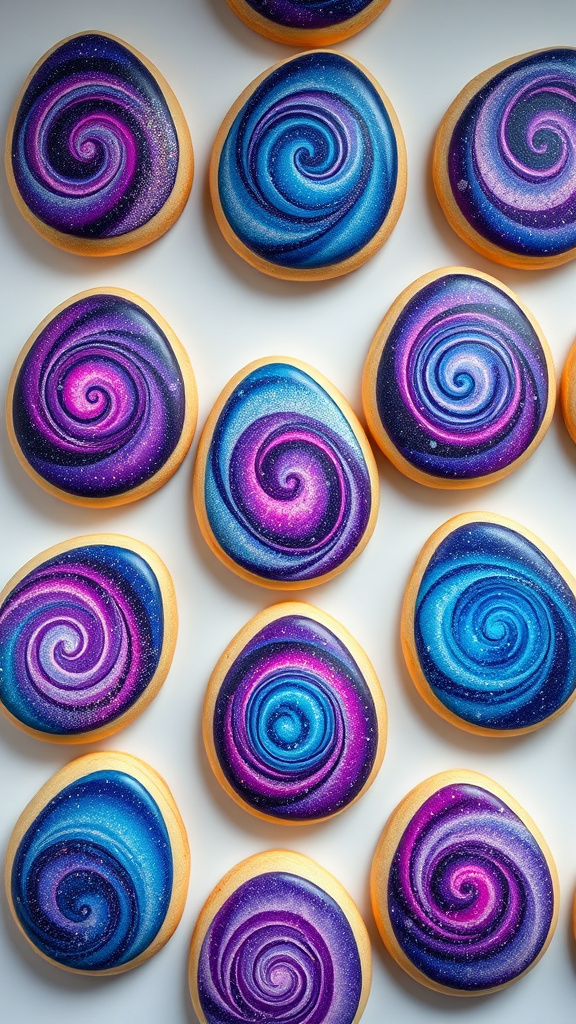
Launch into a creative orbit with these 16. Galaxy-Inspired Easter Eggs! With vivid cosmic swirls and dreamy, space-inspired colors, these egg-cellent Easter treats will surely take your cookie decoration game to stellar heights. Perfect for Earthling gatherings, they’re almost too pretty to eat—almost!
Embark on an artistic baking adventure as you transform simple sugar cookies into interstellar works of art. With a touch of shimmer and a sprinkle of stardust, these Galaxy-Inspired Easter Eggs are bound to steal the show at any festive celebration.
Ingredients
- 2 1/2 cups all-purpose flour
- 1 cup unsalted butter, softened
- 1 cup granulated sugar
- 1 large egg
- 1 teaspoon vanilla extract
- 1/2 teaspoon baking powder
- 1/4 teaspoon salt
- Food coloring gels (blue, purple, pink, black)
- Edible glitter or luster dust
- Royal icing
Instructions
- Preheat your oven to 350°F (175°C) and line a baking sheet with parchment paper.
- In a large bowl, cream together the butter and sugar until light and fluffy.
- Add the egg and vanilla extract, mixing until well combined.
- In a separate bowl, whisk together the flour, baking powder, and salt.
- Gradually add the dry ingredients to the wet mixture, blending until a dough forms.
- On a lightly floured surface, roll out the dough to about 1/4-inch thickness.
- Using egg-shaped cookie cutters, cut out shapes and place them on the prepared baking sheet.
- Bake for 10-12 minutes, or until the edges are lightly golden. Allow to cool completely on a wire rack.
- Divide the royal icing into separate bowls and tint each with different food coloring gels to create galaxy colors.
- Using a toothpick or a small brush, swirl the colors on each cookie to create a galaxy effect.
- Sprinkle with edible glitter or luster dust while the icing is still wet for a sparkling finish.
- Let the cookies sit until the icing is completely set and dry.
These Galaxy-Inspired Easter Eggs are sure to add a cosmic touch to your cookie repertoire, delighting guests with their mesmerizing patterns and delightful taste. Ready to bake your way to the stars? These cookies are your ticket to a galactic Easter celebration!
17. Farmhouse Country Egg Cookies
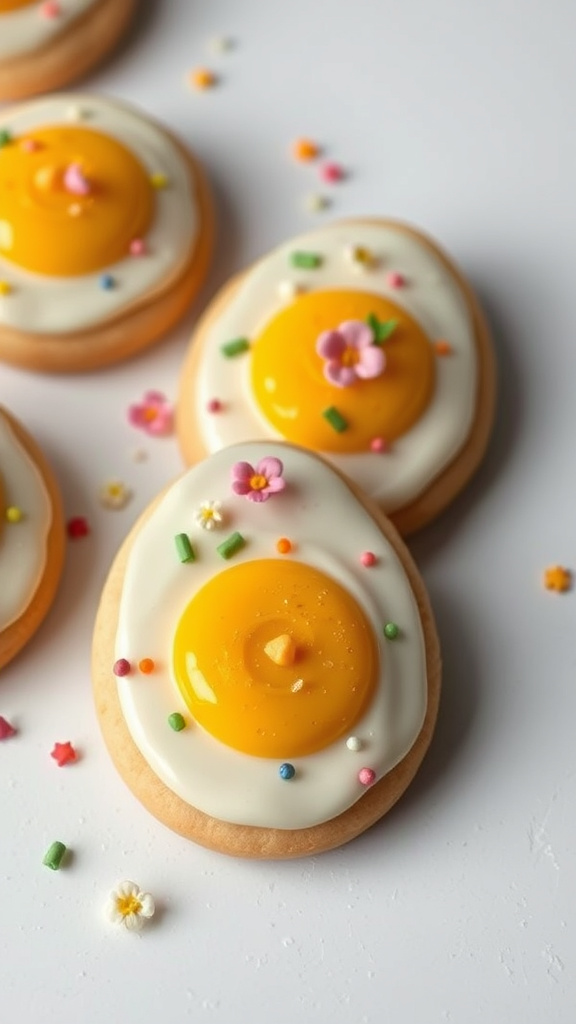
Bring the charm of the countryside to your Easter celebrations with these delightful farmhouse country egg cookies. Adorned with rustic, country-inspired decorations, these cookies are not only delicious but also a feast for the eyes. Ideal for adding a touch of farmhouse elegance to your festive table.
Get ready to impress your guests with these beautifully crafted cookies, showcasing intricate detailing that reflects the simplicity and grace of country living. Perfect for sharing with family and friends, these cookies will steal the show and have everyone coming back for more.
Ingredients
- 2 1/2 cups all-purpose flour
- 1/2 teaspoon baking powder
- 1/4 teaspoon salt
- 1 cup unsalted butter, softened
- 1 cup granulated sugar
- 1 large egg
- 1 teaspoon vanilla extract
- Royal icing for decorating
- Food coloring in various colors
- Farmhouse-inspired decorations (e.g., edible flowers, sprinkles)
Instructions
- Preheat your oven to 350°F (175°C) and line baking sheets with parchment paper.
- In a medium bowl, whisk together flour, baking powder, and salt.
- In a large bowl, beat the butter and sugar together until light and fluffy.
- Add the egg and vanilla extract, and mix until well combined.
- Gradually add the dry ingredients to the wet mixture, mixing until a dough forms.
- Roll out the dough on a lightly floured surface to about 1/4-inch thickness and cut out egg shapes using a cookie cutter.
- Place the cookies on the prepared baking sheets and bake for 10-12 minutes, or until the edges are lightly golden.
- Allow the cookies to cool on the baking sheets for a few minutes before transferring them to a wire rack to cool completely.
- Decorate the cookies with royal icing and your choice of food coloring, creating intricate farmhouse-inspired designs.
- Add finishing touches with edible flowers, sprinkles, or other decorations as desired.
These farmhouse country egg cookies are sure to add a touch of rustic charm to your Easter festivities. With their beautiful decorations and delicious flavor, they are the perfect treat to share and enjoy. Happy Easter and happy baking!
18. Monochrome Minimalist Eggs
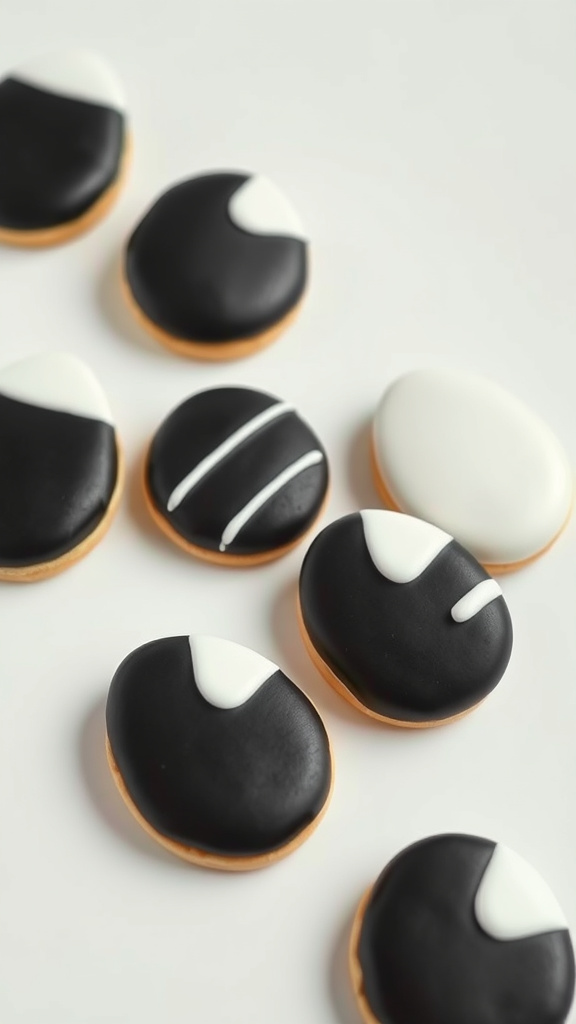
Embrace the elegance of simplicity with Monochrome Minimalist Eggs. These Easter egg cookies offer a sleek and sophisticated twist, proving that sometimes less truly is more. Adorned in black and white, these charming treats are the epitome of modern chic, making your Easter celebration a stylish affair.
Perfect for those who love clean lines and understated beauty, these cookies are a feast for the eyes and the taste buds. Whether you’re hosting an Easter brunch or sending sweet gifts to loved ones, Monochrome Minimalist Eggs will undoubtedly steal the show, leaving a lasting impression on all your guests.
Ingredients
- 1 cup unsalted butter, room temperature
- 1 cup granulated sugar
- 1 large egg
- 2 teaspoons vanilla extract
- 2 1/2 cups all-purpose flour
- 1 teaspoon baking powder
- 1/2 teaspoon salt
- Black food coloring
- White royal icing
Instructions
- Preheat your oven to 350°F (175°C) and line baking sheets with parchment paper.
- Cream the butter and sugar together in a large bowl until light and fluffy.
- Beat in the egg and vanilla extract until well combined.
- In a separate bowl, whisk together the flour, baking powder, and salt.
- Gradually add the dry ingredients to the wet mixture, mixing until a dough forms.
- Divide the dough into two portions. Add black food coloring to one portion and knead until evenly colored.
- Roll out both portions of dough to 1/4-inch thickness on a floured surface.
- Use an egg-shaped cookie cutter to cut out cookies and place them on the prepared baking sheets.
- Bake for 10-12 minutes, or until the edges are light golden brown. Let cool completely.
- Decorate with white royal icing for the black cookies and leave the white ones minimalist to create the monochrome effect.
These Monochrome Minimalist Eggs are not only visually stunning but also delightfully delicious. They bring a touch of modern elegance to your Easter festivities, making each cookie an edible piece of art. Enjoy the balance of beauty and taste with every bite!
19. Fantasy Fairy Tale Egg Cookies

Step into a world of whimsy with our Fantasy Fairy Tale Egg Cookies. These charming treats are adorned with magical designs inspired by your favorite fairy tales. Perfect for bringing an extra sprinkle of enchantment to your Easter celebrations, each bite of these cookies transports you to a fantastical realm.
With colorful icing, edible glitter, and intricate decorations, these egg-shaped cookies will captivate both young and old. Ideal for family gatherings or as a delightful surprise in Easter baskets, our Fantasy Fairy Tale Egg Cookies are sure to steal the show and create lasting memories.
Ingredients
- 2 cups all-purpose flour
- 1/2 teaspoon baking powder
- 1/4 teaspoon salt
- 1/2 cup unsalted butter, softened
- 3/4 cup granulated sugar
- 1 large egg
- 1 teaspoon vanilla extract
- Assorted food coloring
- Royal icing
- Edible glitter and sprinkles
Instructions
- Preheat oven to 350°F (175°C). Line a baking sheet with parchment paper.
- In a medium bowl, whisk together flour, baking powder, and salt.
- In a large bowl, beat butter and sugar together until light and fluffy. Add the egg and vanilla extract, mixing well.
- Gradually add the dry ingredients to the wet ingredients, mixing until combined. Divide dough into portions and add food coloring to each.
- Roll out the dough on a lightly floured surface and use egg-shaped cookie cutters to cut out cookies. Place on the prepared baking sheet.
- Bake for 8-10 minutes or until edges are lightly golden. Let cool completely on a wire rack.
- Decorate the cooled cookies with royal icing, edible glitter, and sprinkles to create fairy tale designs.
- Let the decorations set before serving or packaging the cookies.
These Fantasy Fairy Tale Egg Cookies are magical treats that bring fairy tales to life with every bite. The enchanting decorations make them a standout addition to any Easter celebration, ensuring that your festive gathering is nothing short of extraordinary.
20. Classic Vintage Easter Eggs

Embrace a touch of nostalgia with our Classic Vintage Easter Eggs. These charmingly decorated cookies bring back the magic and whimsy of yesteryears, making them perfect for any Easter celebration. Delight your guests with intricate designs that echo traditional artistry, turning your cookie spread into a timeless centerpiece.
Crafted with delicate piping and a palette of pastel shades, each of these cookies tells its own story. Inspired by vintage Easter cards and decorations, these cookies are not only a treat for the taste buds but also a feast for the eyes. Get ready to impress with these elegant confections.
Ingredients
- 2 1/2 cups all-purpose flour
- 1/2 teaspoon baking powder
- 1/4 teaspoon salt
- 3/4 cup unsalted butter, room temperature
- 1 cup granulated sugar
- 1 teaspoon vanilla extract
- 1 large egg
- Royal icing mix
- Food coloring in pastel shades
- Decorative piping tips and pastry bags
Instructions
- In a medium bowl, whisk together flour, baking powder, and salt. Set aside.
- In a large bowl, beat butter and sugar until light and fluffy. Mix in the egg and vanilla extract.
- Gradually add the dry ingredients to the wet mixture, blending until dough forms.
- Shape the dough into a disk and wrap it in plastic. Refrigerate for at least 1 hour.
- Preheat the oven to 350°F (175°C) and line baking sheets with parchment paper.
- Roll out the dough to 1/4 inch thickness on a floured surface. Use an egg-shaped cookie cutter to cut out cookies.
- Place cookies on the prepared baking sheets and bake for 8-10 minutes, or until edges are lightly golden. Let cool completely.
- Prepare the royal icing according to the package instructions. Divide it into small bowls and tint each with different pastel food coloring.
- Using decorative piping tips and pastry bags, decorate the cookies with intricate vintage designs. Allow icing to set completely.
Creating these Classic Vintage Easter Eggs is a delightful journey into the past. Their delicate, old-world charm and exquisite detailing will make your Easter gathering truly special. These cookies are as beautiful as they are delicious, ready to become a cherished part of your holiday traditions.
Unwrap the Magic of Easter with Zynahz
Discover the irresistible charm of these 20 show-stopping Easter egg cookies that will elevate your festivities. Follow Zynahz on Pinterest, Facebook, and Instagram for more delightful ideas. Join our newsletter to stay in the loop with the latest trends.
Did our cookies spark joy? Share your thoughts in the comments and spread the love by sharing with friends and family!


